- Details
- Written by: The DIY Hunter
- Category: Firearms & Shooting
- Hits: 5270

CVA Accura V2 with Vortex Viper 4-16x50 HS LR mounted with an EGW rail and a set of low Weaver Tactical 4 Hole scope rings.
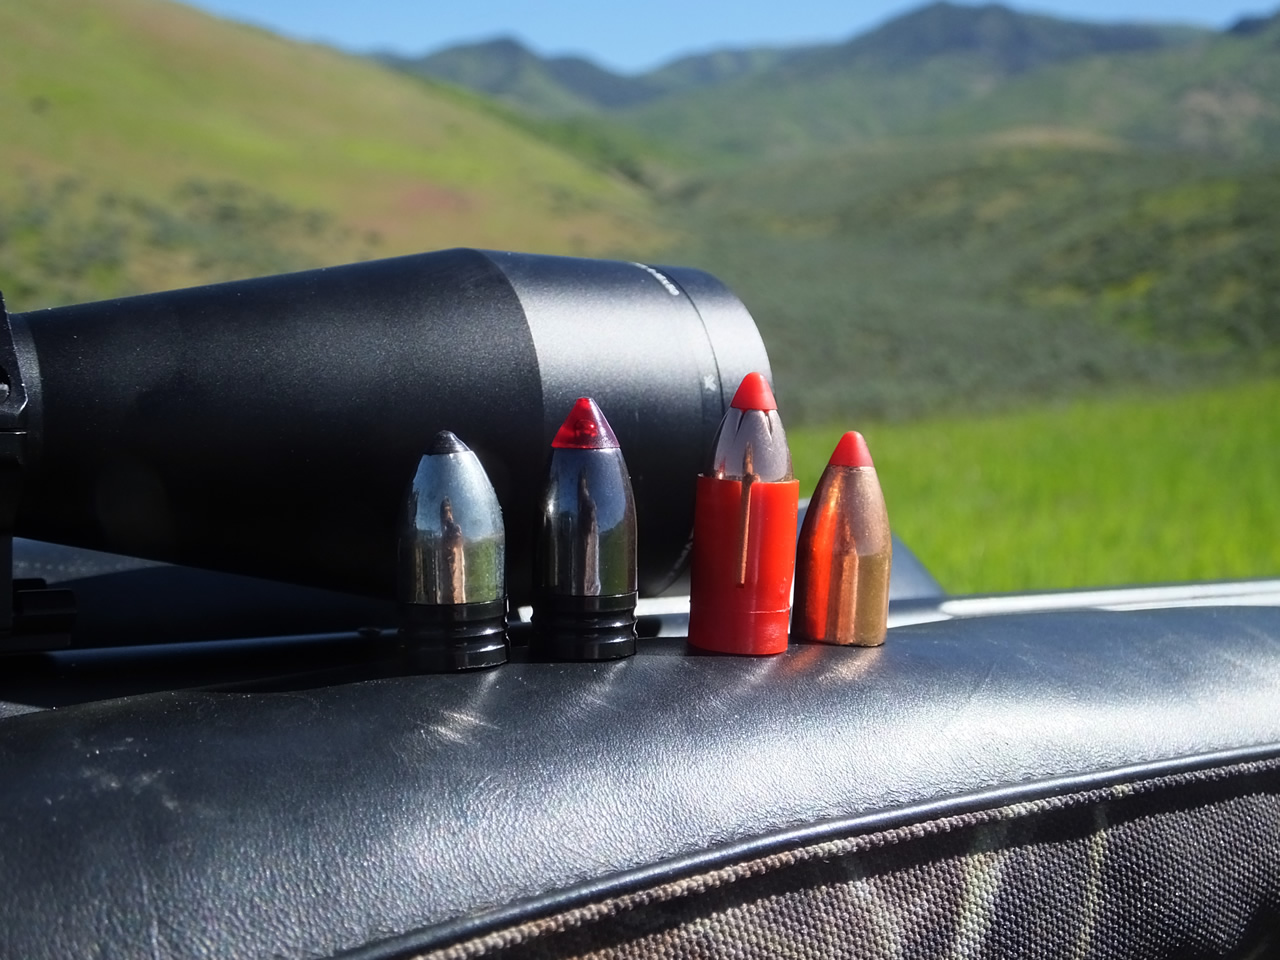
The four 300 Gr Muzzleloader Bullets that I tested today. Powerbelt Platinum, Powerbelt Aerolite, Hornady sabot SST, and Hornady FPB.
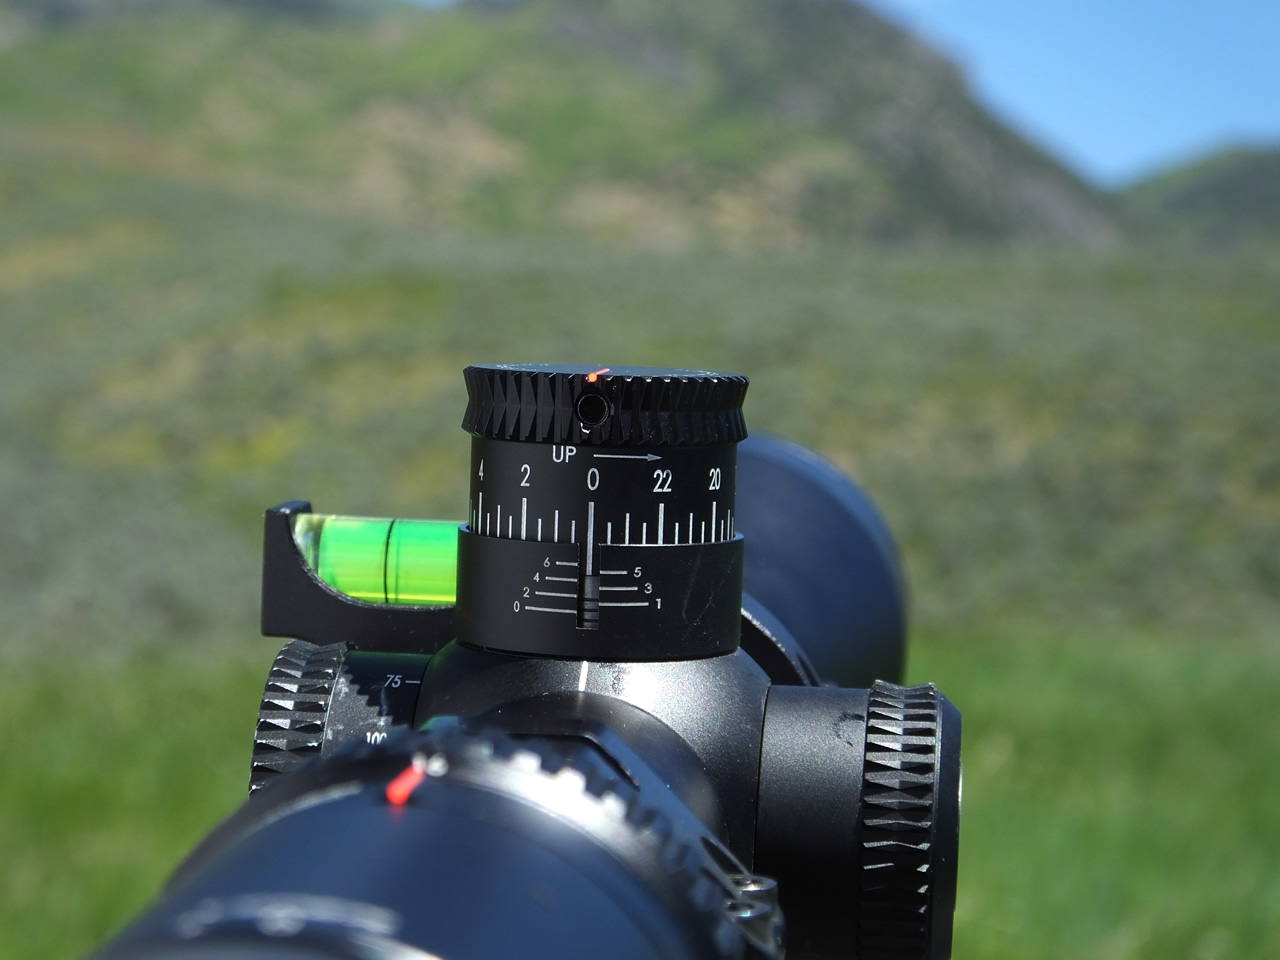
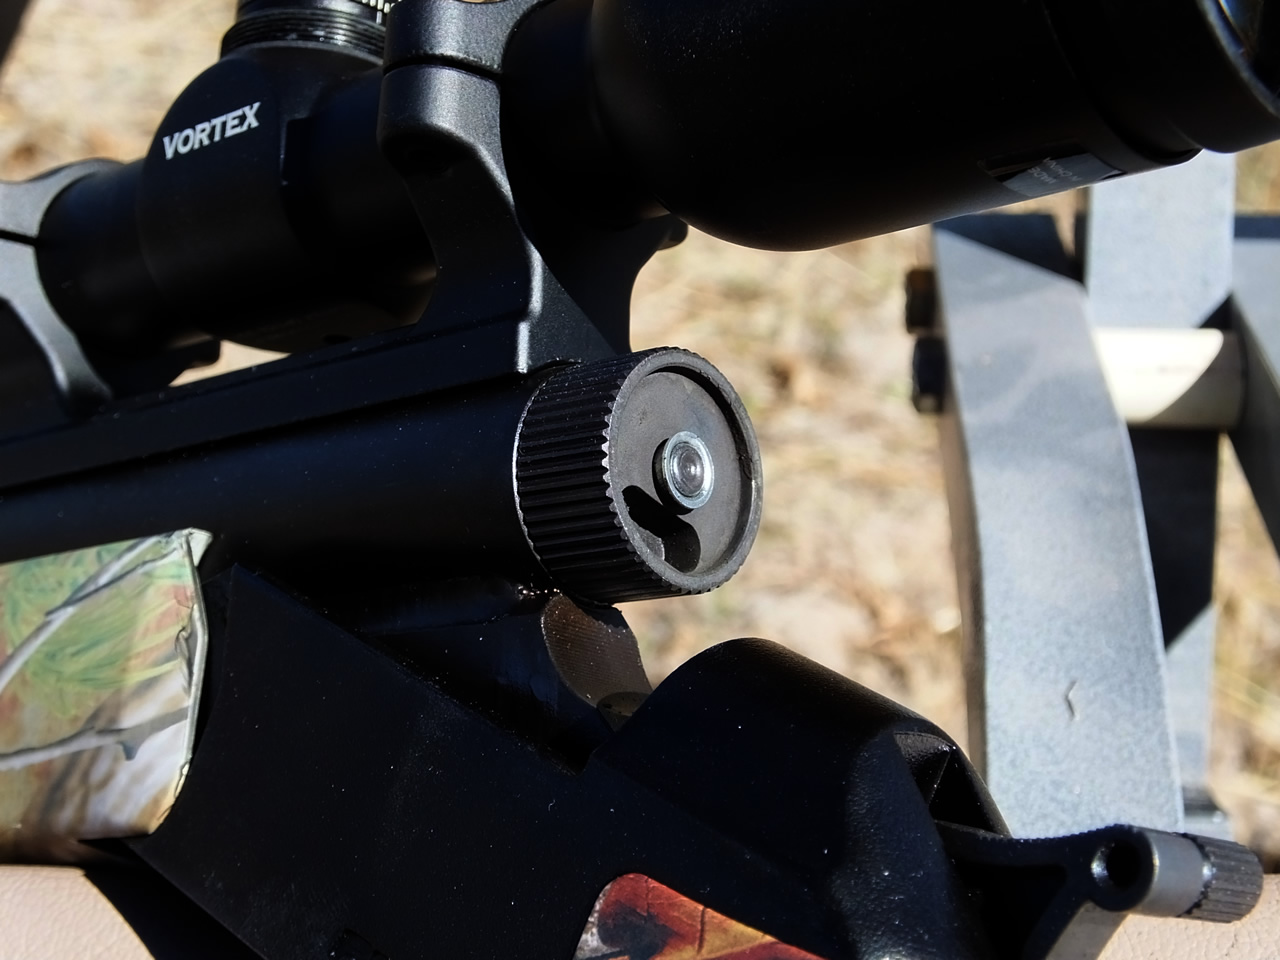
My elevation turret appears that it is almost topped out when zeroed offering me only 25 MOA adjustment for long shots. The hash marks on the turret indicate 6 rotations when in actuality there is just slightly over 3 rotations available for 79.5 MOA of total adjustment. Where it is zeroed right now I have just over one rotation for 25 MOA left to dial the long shots. I am working on getting a custom 20 MOA rail from EGW to give me 20 more MOA to adjust.

My best group today was this 1 1/8" group with 300 Gr Powerbelt Aerolite bullets.

For really tight groups and long range accuracy the Palm Saver on the end of the ramrod may be effecting the accuracy by touching the barrel changing the harmonics.
With my Vortex Viper 4-16x50 HS LR mounted on my CVA Accura V2 muzzleloader I was itching to try it out.
My first time out with this scope on my muzzleloader I had four different 300 grain bullets to test. the 300 grain bullets: Powerbelt Platinum, Powerbelt Aerolite, Hornady sabot SST, and Hornady FPB. To test these bullets all of my powder charges were 100 grains of FFG 777 loose powder.
My normal shooting range is closed right now for construction so I had to shoot out in the scorching sun for a couple hours as I tested muzzleloader. And it was a warm one in the mid 80s and very breezy. So not the most comforatable nor best conditions for me to shoot good groups, not to mention I am sun burnt, ouch!
On this trip out the Powerbelt Aerolite performed the best with a 1 1/8" group and the Powerbelt Platinum did the worst with a 7 inch group. My tests were not scientific in any nature so I will be out testing some more to see if the Aerolite is really the bullet I want to go with this year. With the exception of the Powerbelt Platniums, I am going to keep testing these bullets with different charges, hopefully in better weather conditions as the two Horandy bullet also shot well.
I like the idea of the Hornady FPB bullet and will still keep playing around with it however they were a bit of a pain to get lined up with the bore. They also have the most resistance of any bullet I have seated in a muzzleloader. Also, there were at least three bullets in the package of fifteen that had some QC problems with the cup of the base being rough and jagged. They shot ok but had some fliers that I couldn't account for the reason. I'll keep playing with them for now.
One thing I notice is that it appears I get better groups by not having the ramrod attached to the muzzlelaoder when I shoot. As an example I shot a 2 3/4" group with the ramrod attached and a 1 1/8" group with the ramrod off the muzzloader using the Powerbelt Aerolite bullets. There may have been barrel fowling issues or other factors opening up the one group but in general I have noticed I shoot better with the ramrod off the muzzleloader. It makes sense that the palm saver on the end of the ramrod can easily be rotated and touching the barrel and could definitely effect the harmonics of the barrel. Whenever I need to take a really long shot I will take the ramrod off to make sure I get the best accuracy. Most hunting shots in the 100 yard range I'm not going to worry about the ramrod, just the 200 plus yard shots.
The biggest thing I learned from this trip out is that I am going to have to alter my mounting of the scope. I am using an EGW rail with a set of low Weaver Tactical 4 Hole scope rings. The rail and rings work great I just have an issue with MOA adjustment of the scope. To get the muzzleloader zeroed at 100 yards I had to adjust the turret up so high as to only leave me with 24 MOA left to adjust. This is just not enough adjustment for what I am wanting. I really can't take any advantage of having such a nice scope on this muzzleloader with the lack of vertical adjustment. At a minimum I would like 35 MOA of vertical adjustment to take longer shots. My only option that I can see now is to go with Burris Signature Zee rings where I can use shims inside of the rings to add MOA but these rings are higher so I may need to add something to the comb. Hmm...
Now to figure out how to get the scope mounted better and up the powder charge to be able to have the energy needed at longer ranges.
- Details
- Written by: The DIY Hunter
- Category: Firearms & Shooting
- Hits: 5154
With Utah opening up the use of optics for muzzleloaders to anything goes, I have started working on setting up my CVA Accura V2 with optics to see how far I can effectively shoot. My blog entries will be a work in progress as I continue working on setting up and testing my muzzleloader with a variable power rifle scope.
With a 1x Vortex scope and 300 Gr SST Hornady bullets I was dialing up shots out to 200 yards quit effectively in 2015. I'm excited to see what I can now do with some higher power glass.
To start with I am going to try my favorite big game scope, that being a Vortex Viper 4-16x50 HS LR. I have a couple of these scopes and love them. I like that they have 24 minutes of angle adjustment in elevation with just one turn of the turret. I think this scope is a little on the overkill size for what I think my muzzleloader is capable of but I need to pull one of these scopes off a rifle anyways so this will work out perfect to test and see how I like it.
Given my work schedule this year I will most likely missing out on my favorite hunt, that being archery elk hunting. I am just too busy in August and September to be able to spend any time in the field hunting. So once again I will most likely be muzzy elk hunting around the first of November.
Dallen also recieved a CVA Accura V2 for his high school graduation gift. We will be setting up Dallen's muzzleloader also. I am right now looking at the Vortex Diamondback HP line of scopes, particularly the 2-8x32.
Next up is my first trip out testing this scope and various 300 Gr bullets.
- Details
- Written by: The DIY Hunter
- Category: Firearms & Shooting
- Hits: 67871
In 2015 both Dallen and I drew muzzleloader deer tags in Utah. With only owning one muzzleloader, that being a TC Encore, we were in need of another one so that both of us could hunt together.
This mule deer hunt will be Dallen's first time hunting with a muzzleloader and he's a little nervous about the idea of not hunting with a rifle for the first time.
I like my TC Encore however for the price I haven't been particularly happy with the really heavy trigger pull of 6 pounds, a trigger pull that is going to require a gunsmithing to correct. Also the issue the Encore has with Winchester 209 primers, that include the Winchester made Triple 7 primers, being a hair too long for TC's tolerances. These primers prevent the hammer from being cocked unless you open and close the action several times to bend the primer.
For my second muzzleloader I've had my eyes on the different varieties of CVA Accura muzzleloaders. CVA has a bunch of varieties to chose from. I thought really hard about the 30 inch barreled Real Tree Max-1 Long Range version but given I am restricted to a one power scope the extra weight of the longer barrel was not going really going to extend my range.
In the end I decided to go with the Nitride rust proof finished, stainless, 27" barrel. At first appearance the Nitride finished muzzleloaders look like they are traditional blued barrels that can rust from the corrosive black powder and substitute powders. However, CVA is using stainless barrels and making them even more rust proof by applying a Nitride chemical finish that chemically alters the barrel inside and out. A process the military has been doing for some time now. These barrels are as rust proof as they get which is perfect for muzzleloaders.
One of the first things I quickly noticed with this muzzleloader is the trigger pull. Wow, it breaks consistently at 2 1/4 pounds. Very nice! And the trigger pull is easily adjustable with a set screw located directly behind the trigger guard. I have no plans of adjusting the trigger as it feels great at 2 1/4 pounds but I probably could easily adjust the trigger even lighter. For now I'm going to leave the trigger right where it's at. This trigger is amazing especially compared to the 6 pound trigger pull that isn't adjustable on my more expensive TC Encore muzzleloader.
The CVA Accura V2 comes with Quake Claw sling. Quake Claw slings are what I place on all of my hunting rifles... well the Browning version of these slings. Browning sells the same slings under the name of Clincher. Claw\Clincher slings are rubber over-molded over a nylon strap. I find these slings to grip on my shoulder the best keeping my rifles from sliding off my shoulder.
CVA Accura V2 muzzleloaders also come with a nice single piece Dead On scope mount. This scope mount, mounts securely to the barrel with three screws.
With a scope mount and sling provided all I needed was a scope. Given Utah's restriction to only 1x scopes it really limits down the list of scopes to chose from. Over the past several years I have been setting up almost all of my rifles with more tactical like scopes that allow for me to use Strelok Pro Ballistics Calculator app to calculate the needed amount of MOA to dial on the scope for any particular shot. I have come to really like the Vortex line for rifle scopes. Vortex offers great tactical features in many of their scopes, at a price that is very reasonable given the features and they have the best warranty in the industry.
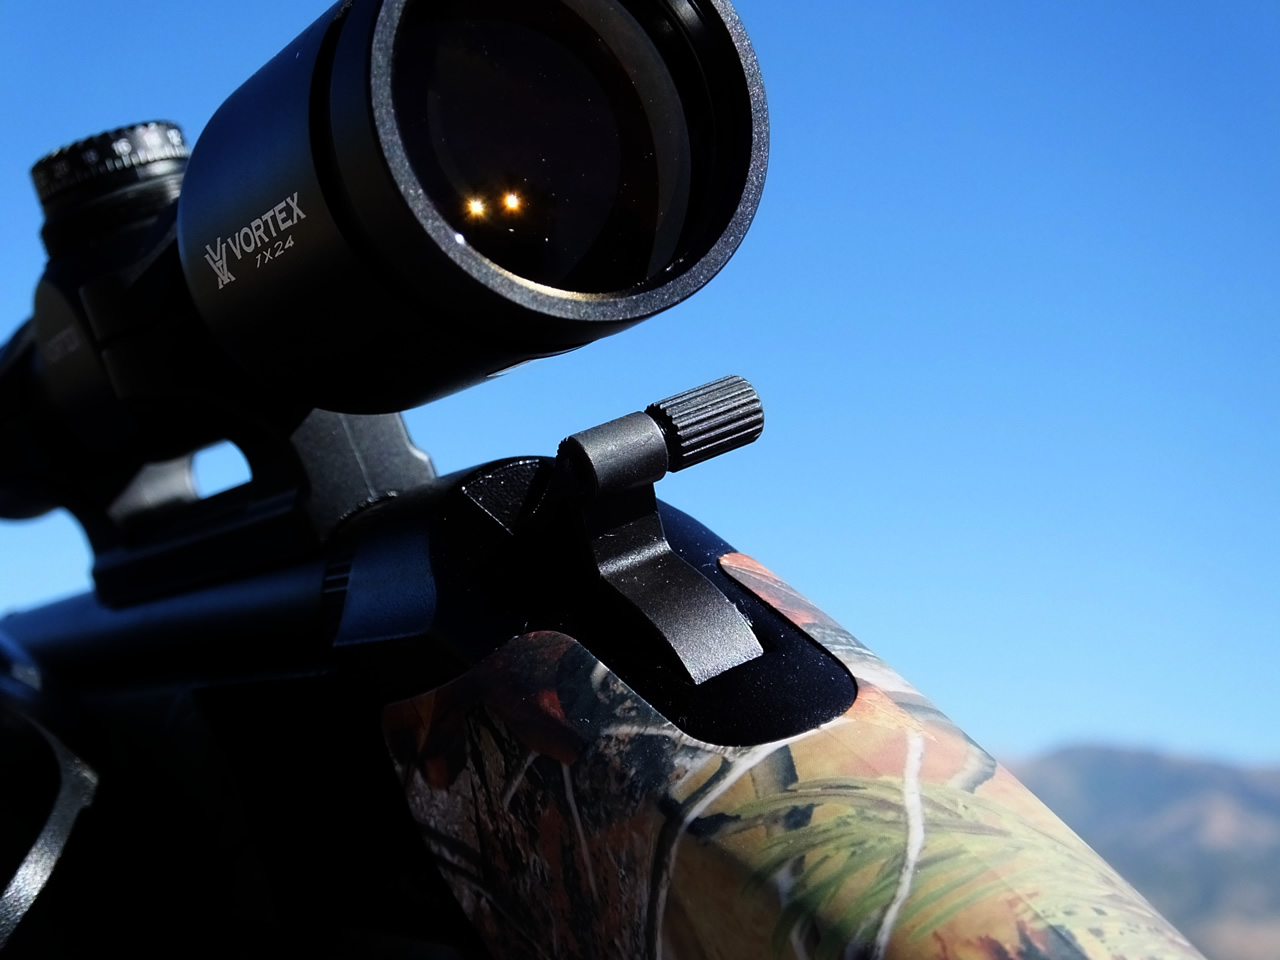
Vortex started offering a 1x24 scope a couple years back so I went with that scope for this muzzleloader. This scope has a much greater field of view than the Nikon 1x20 that I have on my TC Encore and like the Nikon I can remove the elevation cap from both 1x scopes and dial up MOA for a longer shot.
To get the muzzleloader on paper to sight it in I removed the breach plug and looked down the barrel to get it bore sighted. This process takes just a couple of minutes and has always worked great at getting me on paper without any fancy equipment.
I have learned from shooting in the past that loose powder has given me more consistent velocities and accuracy over powder pellets so loose FFG Triple 7 powder was all I tried. To sight in the CVA I brought 300 grain PowerBelt and 300 grain Hornady SST bullets. I have liked the SST bullets accuracy from the past but also wanted to see how the popular PowerBelt bullets would shoot.
Both bullets shot equally well. Given how I have shot in the past I like to run a butter bore cleaning patch through between each shot. This works great for using the plastic sabot Hornady SST bullets however I have learned that PowerBelts shoot better with a dirty or saliva cleaning patch between shots and not a butter bore patch.
After I had the muzzleloader sighted to be dead on at 100 yards I set out my target at 200 yards and placed a couple milk jugs out at various ranges to shot at. I decided to go with the Horandy SST bullets given the higher ballistic coefficient. When I get a chance I will try saliva patches with the PowerBelts and see if I can get better accuracy than the SST and if so I will switch to them. As best as I could find the 300 Gr SST has a BC of 0.25 and the 300 Gr PowerBelt's BC is 0.214.
In the video on this page you can watch me hit milk jugs at 200, 147 and 167 yards. This was a 1, 2, 3 shot hits in succession. I slowed down the video of the 200 yard shot and you can clearly see the bullet traveling on it's path to the milk jug. Strelok Pro gave me 2 MOA for the 147 yard shot, 3 MOA for the 167 and 5 MOA for the 200 yard shot. I'm going to really like this muzzleloader!
I have been really busy during the month of August working with an attorney to get Dallen eligible with the UHSAA to play basketball for his senior year at Layton Christian Academy. Because I have been so busy I just didn't have time to hunt for elk with my bow this year like I like to do but I'm super excited to be using this CVA Accura V2 on a muzzleloader elk hunt come the first of November as well as my mule deer hunt in September.
Next up, muzzleloader Utah deer hunting where Dallen gets a nice buck at 192 yards with this CVA Accura V2.

My CVA Accura V2 with Nitride finished barrel - a pretty nice looking modern muzzleloader.
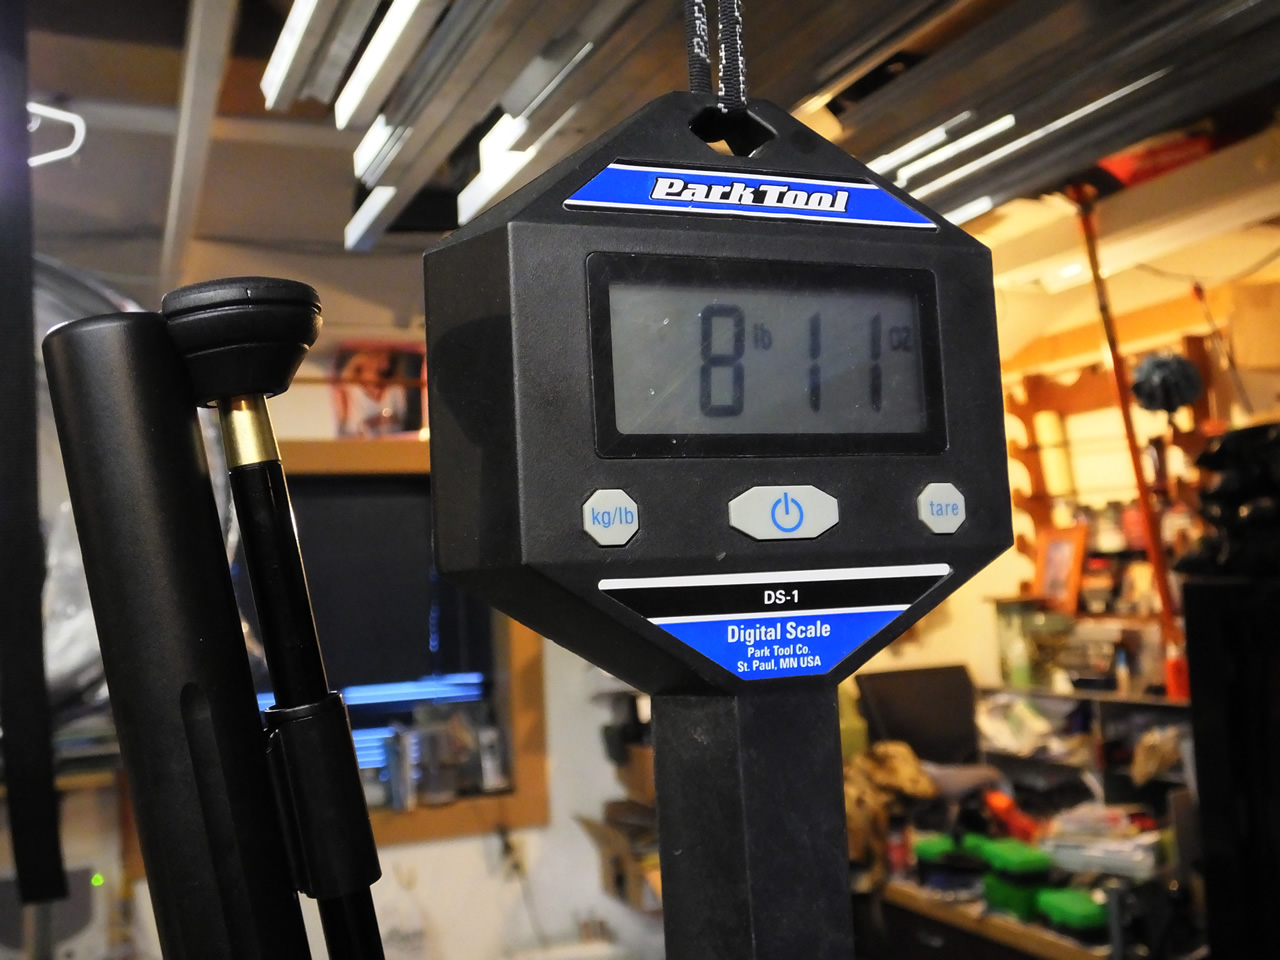
With a Vortex 1x24 scope on this CVA Accura V2 the overall weight comes in at 8 pounds 11 ounces.
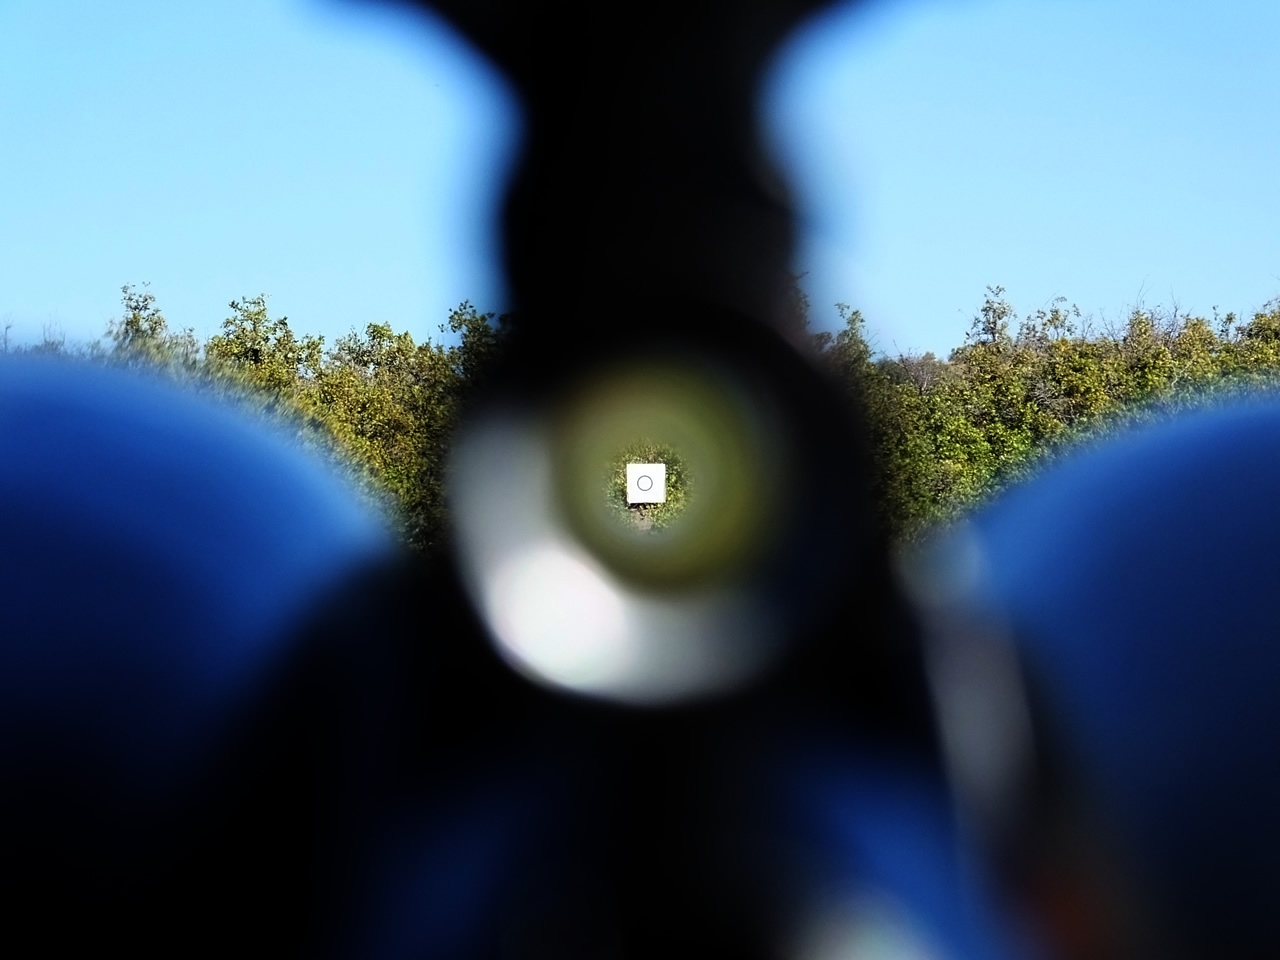
With the breach plug removed I am bore sighting by looking down the center of the bore and aligning this by adjusting the scope to match where the bore is pointing.
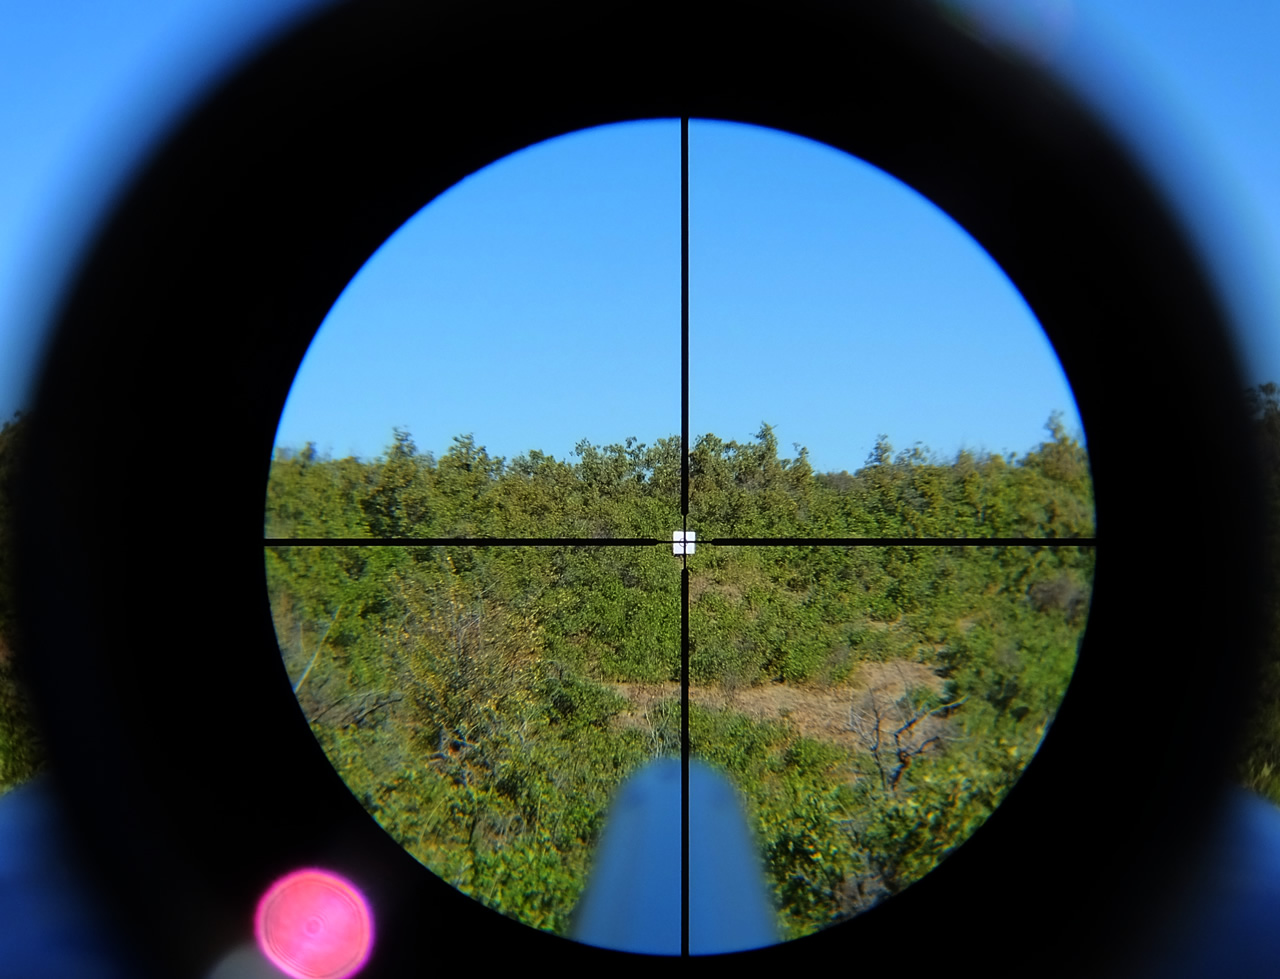
Here is a view of my muzzleloader targets at 100 yards through the 1x24 Vortex muzzleloader scope. Given the lack of any magnification in the scope these targets have a large dark circle with a one inch fine grid in the center to help with scope adjustment.
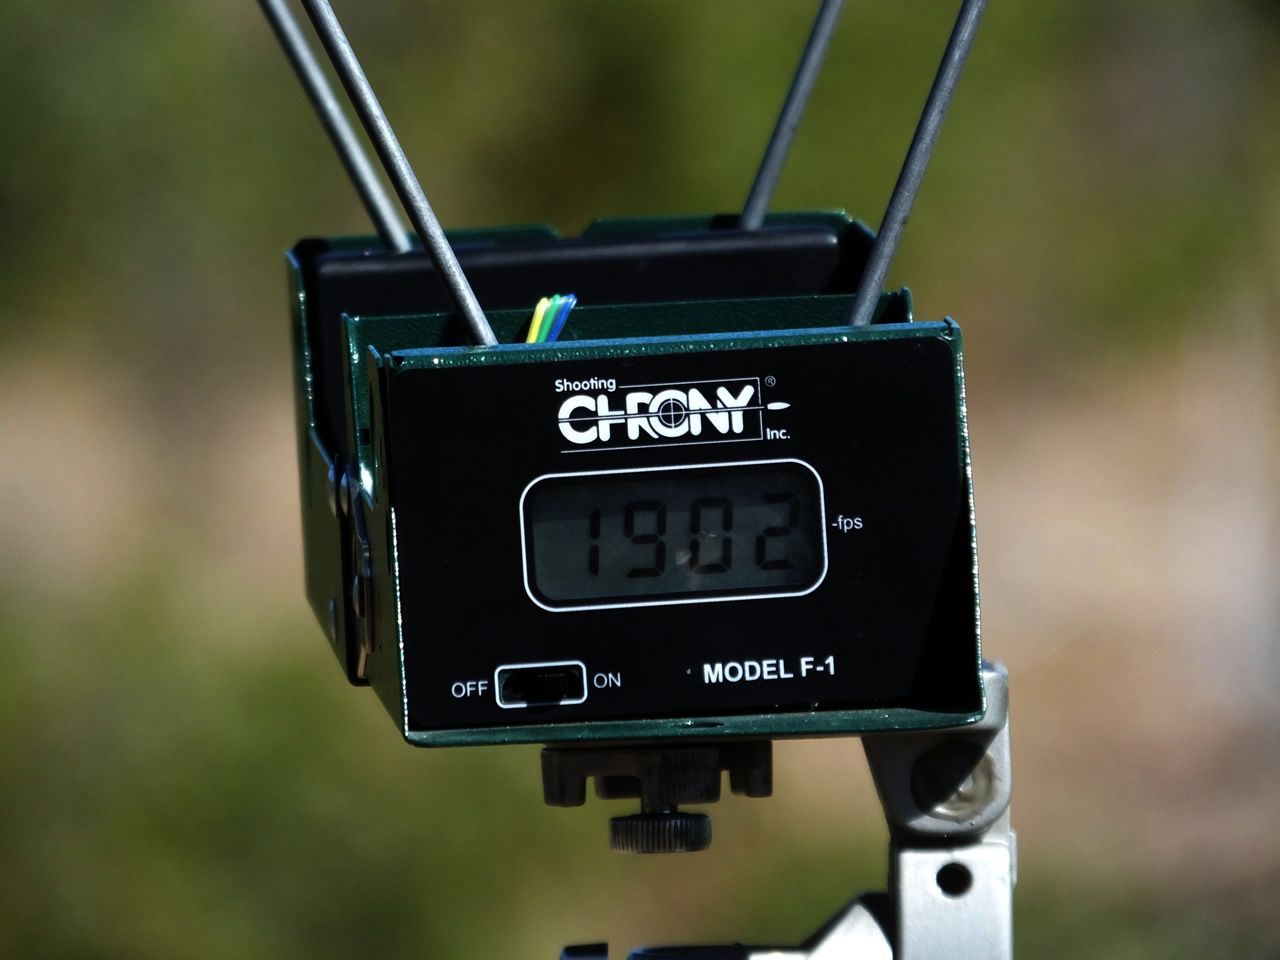
100 grains of Triple 7 FFG power behind a 300 Gr PowerBelt was showing right at 1900 FPS on the Chrony.

300 Gr PowerBelt three-shot group at 100 yards with a 1x scope. Not too bad of a group at just under 2 1/2 inches. I also like groups that hold tight vertically and vertically this group is under a half inch. Horizontal variance can be affected by the wind which is out of my control and there was a little wind when I was shooting but not really strong.
The hammer spur on the CVA Accura V2.
The 209 primer protrudes out of the breach plug with plenty of room to easily remove a spent primer with your fingers.