- Details
- Written by: The DIY Hunter
- Category: Outdoor
- Hits: 9915
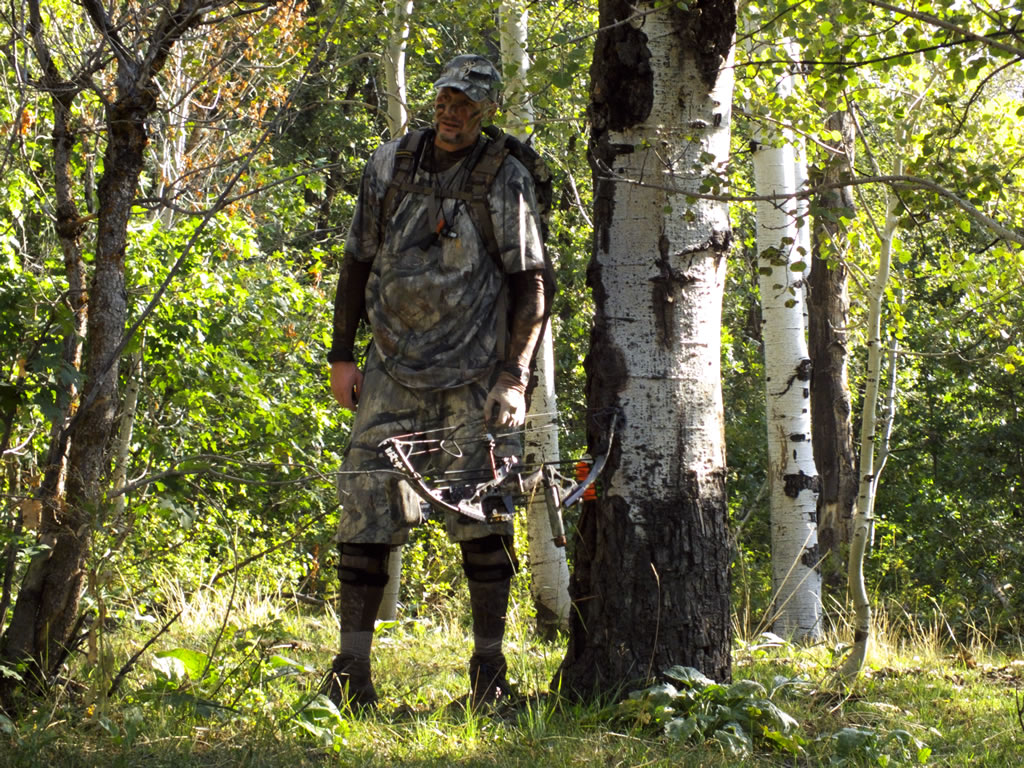
Here is a photo of me hunting elk in September of 2011. It shows Mossy Oak Treestand camo by some quaking aspen trees. My shorts and t-shirt are Mossy Oak Treestand camouflage and my compression fit undergarments are Mossy Oak New Break-Up.
See more:
Mossy Oak TreeStand Camouflage Photos Archery Elk Hunting
Fourth Knee Surgery - Hunting with the help of DonJoy Defiance Knee Braces
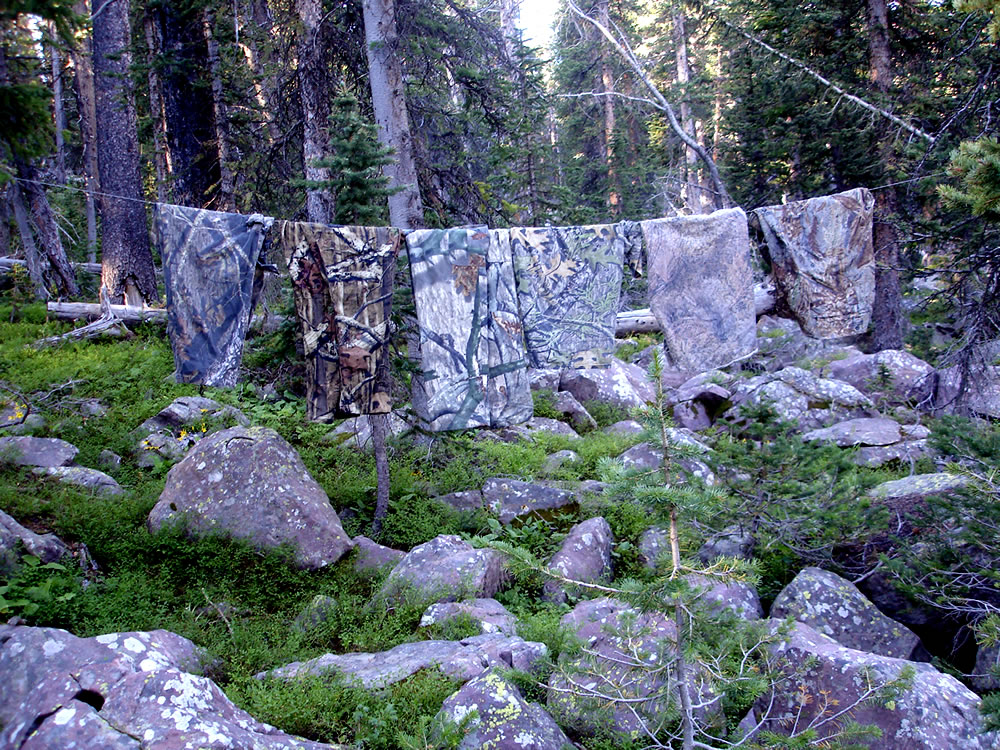
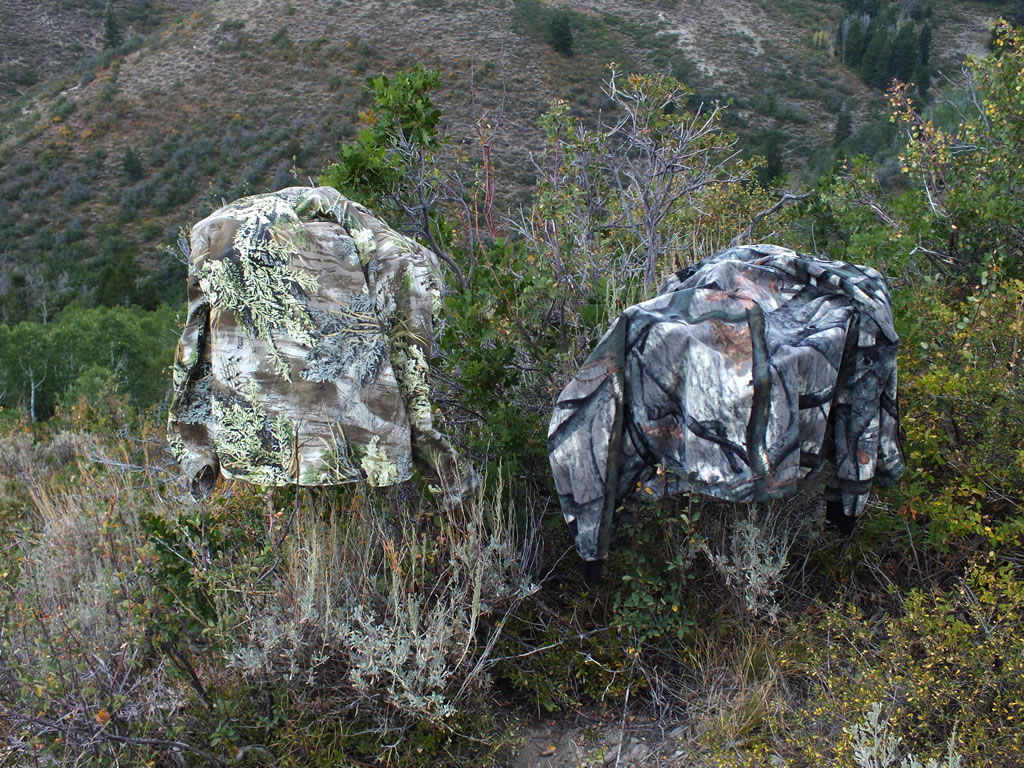
This photo shows six different Mossy Oak camo patterns. All clothing samples in the photo are lightweight cotton.
L-R: New Break-Up, Break-Up Infinity, Treestand, Obsession, Brush, and Duck Blind
I took this photo just before the archery season on August 16th 2010 in the Uintah Mountains at an altitude of 10,330 ft. These mountains are filled with heavy pines, boulders and dead fall.
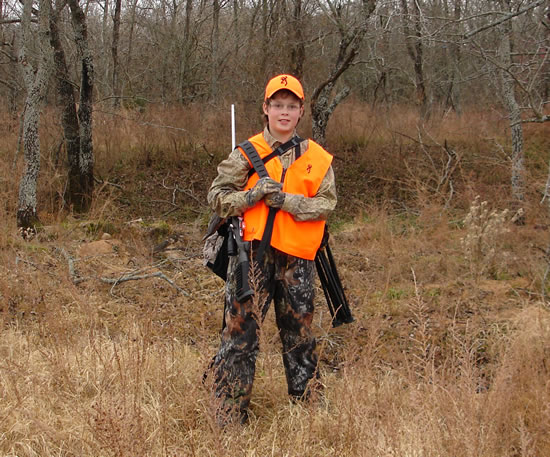
This photo was taken during the 2008 rifle deer season in eastern Oklahoma in late November.
2008 Whitetail Deer Hunt — Dallen & His First Deer
Notice how my son Dallen's shirt in Mossy Oak Brush blends in much better than the Break-Up pants.
I think the best camo pattern for this area and time of year is Duck Blind.
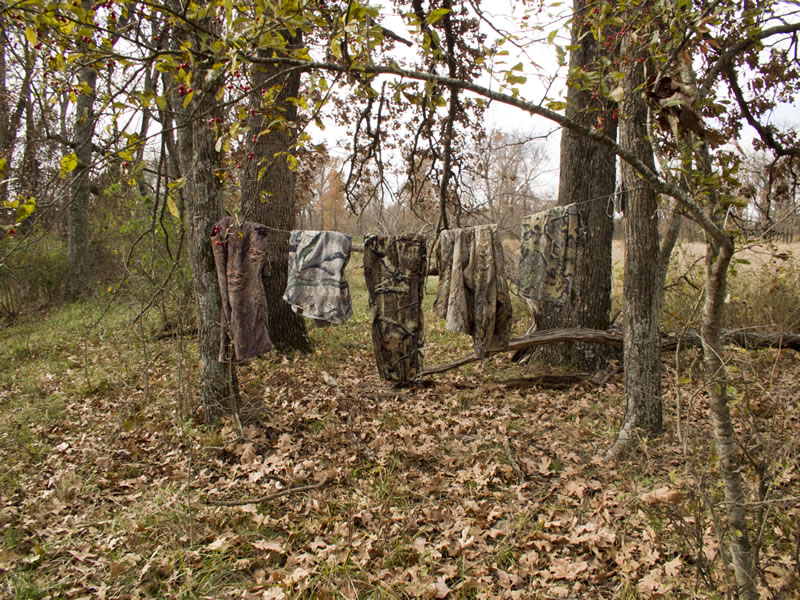
This photo was taken during the 2010 rifle season in Eastern Oklahoma in late November and shows five different Mossy Oak camo patterns.
L-R: Brush, Treestand, Break-Up Infinity, Duck Blind, and Obsession
While on the ground hunting in Oklahoma in 2010 I prefered Duck Blind, Brush and Break-Up Infinity. You can see more photos of Camo in the field in my: 2010 Oklahoma Whitetail Hunt — Hunting with 243 WSSM & 270 WSM Rifles
As you may know from reading other journal entries or my Bio on the website I currently work for Browning. When it comes to camouflage, Browning uses Mossy Oak® camouflage patterns. And even though there are many other excellent brands of camo and various patterns I have tried to stay loyal to the brand I love and the camo Browning produces on its clothing and other products. With that said the camo patterns I use are various patterns of Mossy Oak brand of camouflage.
For many years my only camouflage option was various versions of darker and darker Break-Up® camo. Can you tell I'm not a fan of New Break-Up? However in recent years Mossy Oak has been producing other camo patterns that I have greatly enjoyed. :) Now I do think, New Break-Up is a good pattern if I am going to be in the dark pines the entire time hunting but if I step out into the sagebrush or quaking aspens I stick out like a sore thumb. For the most part, I think that New Break-Up in many terrains makes you look like a black blob and does very little to break up your outline.
My favorite western camo pattern right now (Fall of 2011) is Treestand. The large areas of light and dark creates great contrast that works very well in many different terrains in breaking up your outline. Treestand camo pattern is excellent in the quaking aspens, sagebrush and granite boulder/rocks of the west. The Treestand camo pattern allows me to go from quaking aspens to sagebrush to a boulder field and into pines and I don't look like a dark or light-colored blob. Because this camo pattern has such large areas of light colors and large areas of dark colors it gives you great versatility in breaking up my outline in numerous different settings.
With the exception of the Treestand pattern all of the different patterns work really good as long as you are in the matching color of vegetation. As soon as you step into different terrain and vegetation often you appear as a large blob of solid color that doesn't match the location. Treestand, in my opinion, does the best job of helping you blend in the largest variety of locations.
My second favorite camo pattern is Duck Blind. This camo is similar to the Brush pattern in color but offers better contrast with dark areas that help break up your outline. Duck Blind is great for areas where the vegetation is yellow and brown.
Eastern Oklahoma where I hunt Whitetail deer from time to time is a perfect area for Duck Blind or Brush as much of the vegetation is very yellow and brown during the late archery season and the rifle season in November/December.
I plan on updating this article periodically as I go hunting in different locations. I will continue to post different photos as I can of camo patterns in different locations and vegetation/terrains.
Dec. 2010: I paid close attention to camo patterns on my recent hunting adventure in Eastern Oklahoma. I had a lot of Break-Up Infinity along for the trip. Infinity looked really good when you were right on the ground in the leaves or against a tree. The fleece TreeStand camo clothing I had with me was a little too dark of reproduction of the camo pattern on this fleece material in my opinion and I question if it was more effective than Infinity camo even up in a tree stand. When it was warm enough I used my lightweight cotton Treestand camo shirt and pant with the camo pattern colored properly and it appeared to work well.
My favorite camo from the open fields to the timbered creek bottoms of Oklahoma is Duck Blind. Duck Blind blended very nicely in the greatest number of areas I hunted while on the ground... now once I was in a tree I prefer a light-colored version of TreeStand, but if I was on the ground Duck Blind or Brush would be my favorites.
After returning home from Oklahoma I went looking for some lighter colored Mossy Oak TreeStand in some fleece. I really really like MOTS(Mossy Oak TreeStand) camo for hunting out west as long as it is printed really light on the clothing material. I found that the Genesis Fleece and 4x Microfleece that Browning produced are light just like my Browning Wasatch cotton shirts and pants. The only problem is that Browning discontinued both the 4x Microfleece in MOTS and the Genesis Fleece in MOTS. With some checking around I found some Genesis Fleece in MOTS at Sierra Trading Post. It was a little hard for me to swallow being a Browning employee and buying a Browning product from a retailer but, Sierra's price for the Genesis Fleece was actually not all that bad. Now as an employee I still could have bought the product cheaper if I had been paying attention to what Browning had closed out last year. Anyway in the process, I found that Sierra Trading Post buys a lot of various Browning products.
January 2012: Browning is now offering Realtree camo patterns. Yeah! I look forward to getting some Realtree AP and Realtree Max-1 camo clothing. They both look to be excellent camouflage patterns for the areas I like to hunt. If I could just convince the powers that be at Browning to offer some King's Camo, Hmm...
August 2012: I've been using Realtree camo for the first time since I started working at Browning back in 2000. I've been using Max-1 camo on my 2012 Archery Hunting for Elk in the Utah Wasatch Limited Entry Unit. I'm liking the camo a lot. I'm now going back and forth between Max-1, Treestand, Duckblind and Brush for my western big game hunting.
- Details
- Written by: The DIY Hunter
- Category: Outdoor
- Hits: 5409
![]()
DIY arrow paper tuning stand. The paper shows a perfect arrow punch from my son's new Browning Micro Adrenaline bow.
![]()
Dallen's first time out shooting his new Browning Micro Adrenaline bow.
I find having a well tuned bow is crucial for me to get the best possible accuracy from my bows. Here is an inexpensive paper tuning stand that I use to paper tune my arrows.
I take a wire close hanger and bent it into a rectangle shape approximately 8 1/2 x 11 inches. Then I take a piece of mending plate and nut and bolt the hanger to a tripod. A piece of standard 8 1/2 x 11 paper can be taped across the frame and the tripod can be adjusted in height to place the tuning paper at least three feet in front of my arrow block target.
Dallen's new Browning Micro adrenaline is the last bow that I used the stand to paper tune. I made just a few adjustments to the bus cables to get the timing of the two cams in sync. After I had the cams in sync with each other I shot the perfect bullet hole on my first shot through my paper tuning stand.
I have been using two different full sized Browning Adrenaline two cam bows for the past six or seven years and have really like them. I made a few modifications to my bows. Basically I just replace the fifteen inch limbs with fifteen and a half inch limbs then I make new strings to fit. By adding the longer limbs I get a full thirty two inch draw length that I require.
Dallen's new Micro Adrenaline has got me wanting to upgrade to a new bow myself. I really like the parallel limb design and it is a sweet little bow to shoot.
- Details
- Written by: The DIY Hunter
- Category: Outdoor
- Hits: 4194
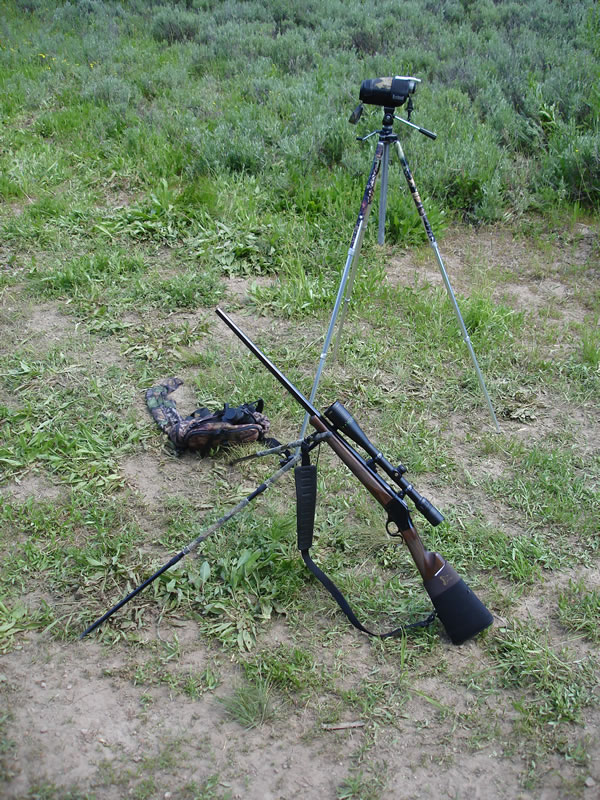
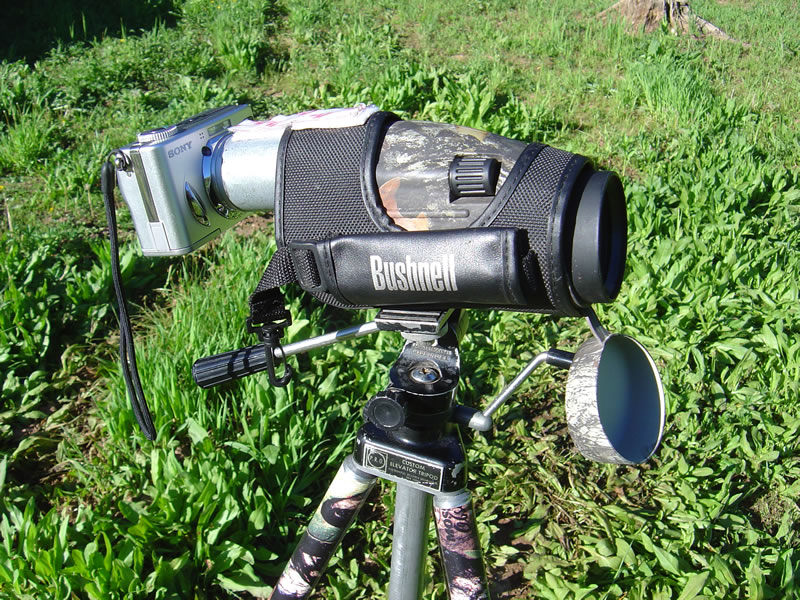
While camping this past week I setup my Sony W7 digital camera on my Bushnell Sentry spotting scope to take some video of a milk jug that I placed on some rope tied between two trees at 311 yards. Even with the low quality of video, that this camera shoots, you can clearly see the vapor trail of the bullet.
I was shooting my 243 WSSM Winchester Model 1885 with 55g Ballistic Tip factory load bullets. These bullets have a muzzle velocity of 4240 fps from this rifle. I was shooting from a sitting position using my Stoney Point Steady Stix with a tripod and my digiscope to the right of me.
This inexpensive digiscope setup has worked pretty good for me for several years. However my camera has now developed some internal floaters that place a couple of blurry spots on the photos and video I take with the camera zoomed.
With my camera now having issues I have been looking for a better camera/digiscoping solution. I think I've found it in the new breed of digital point and shoot cameras, cameras like the Nikon P100, Olympus SP-800UZ, Fujifilm Finepix HS10, or Pentax X90. These are point and shoot cameras with very high optical zooms. These cameras also offer high resolution still images along with good to excellent video qualities depending on the camera. With a camera like one of these there is no need for a digiscope setup, just place the camera in a steady tripod and take video and still images at amazing distances.
Right now I'm leaning toward the Fujifilm or Nikon cameras as they both take high resolution 1080p video. The Fujifilm camera takes AA batteries and I think that is a huge plus but the Nikon I think might take a little better quality of images... maybe. I need to find some money somewhere and get one.
Update Nov. 8th 2010: I finally bit the bullet and ordered a camera from my favorite computer/gadget website newegg.com. I went over and over the specs, reviews etc and felt that the FujiFilm FinePix HS10 was the best camera for me. It was hard for me to chose this camera over the Nikon P100. I'm looking forward to getting this camera in the field to see what it can do. Here are some of the different features that made me chose the HS10 over the P100:
- It takes AA batteries
- It can take Raw images. This will be handy for taking photos that Browning (my day job) may want to use.
- It has a 30x zoom compared to a 26x zoom
- It has a manual zoom. Motor driven zooms mean one more thing to chew up battery and on more thing that might break.
- It has a standard 58mm threaded lens, thus allowing for filters and teleconverters to be threaded on the front. The manual zoom also allows for teleconverters to be placed on the lens without a motor to get messed up trying to move the lens with a teleconverter attached. See my 51X Ultra Super Zoom FujiFilm HS10, HS20EXR and Sony VCL-DH1758 Teleconverter entry for more info on teleconverters.